 Save Pin
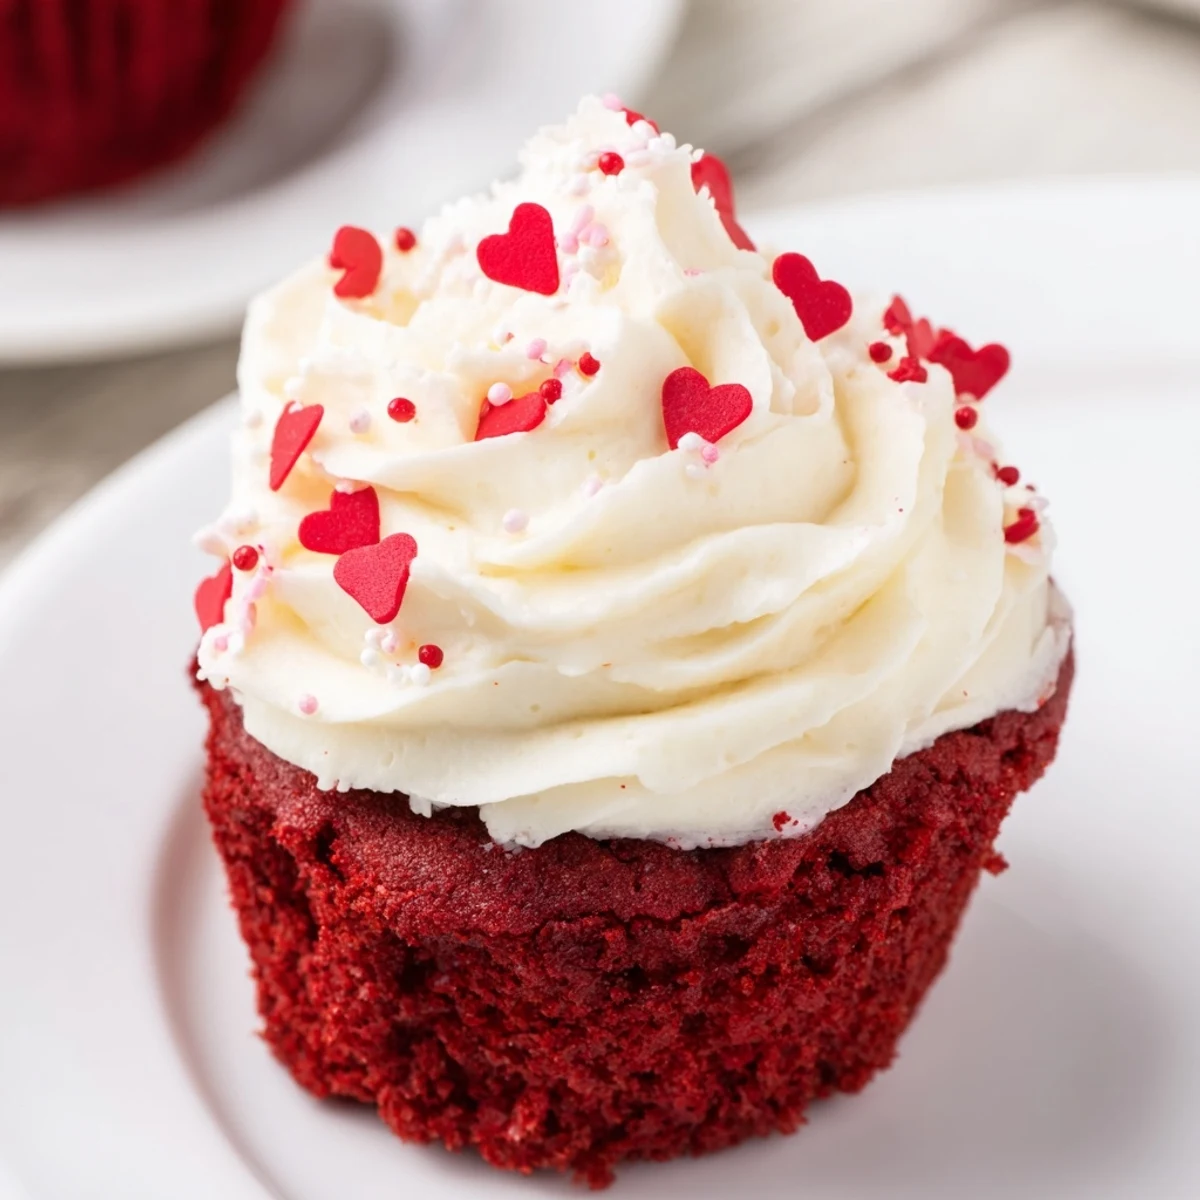
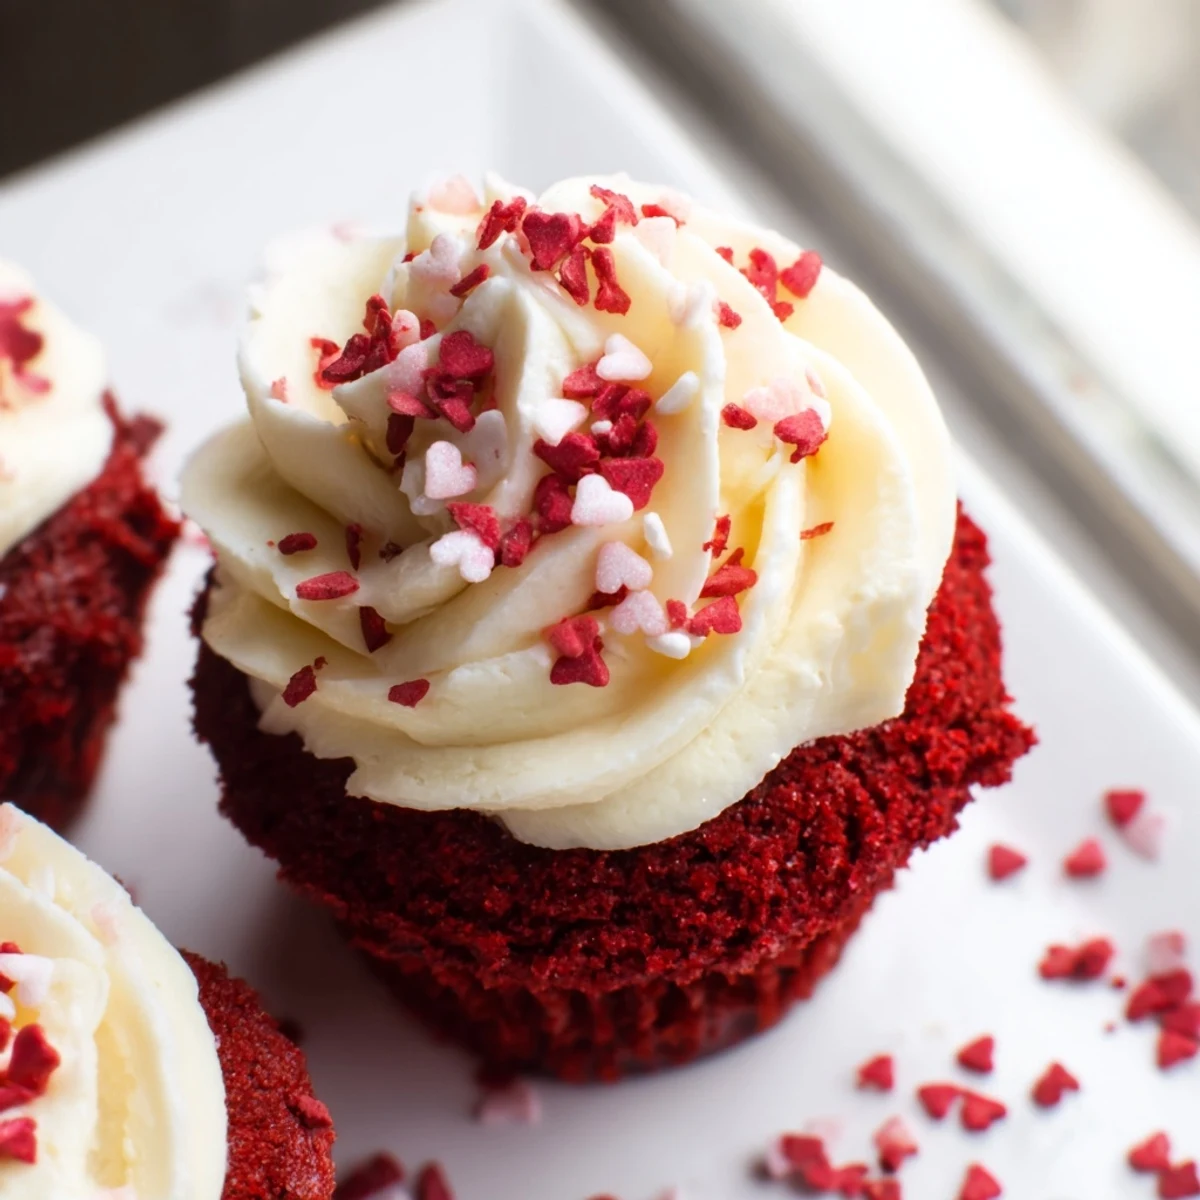
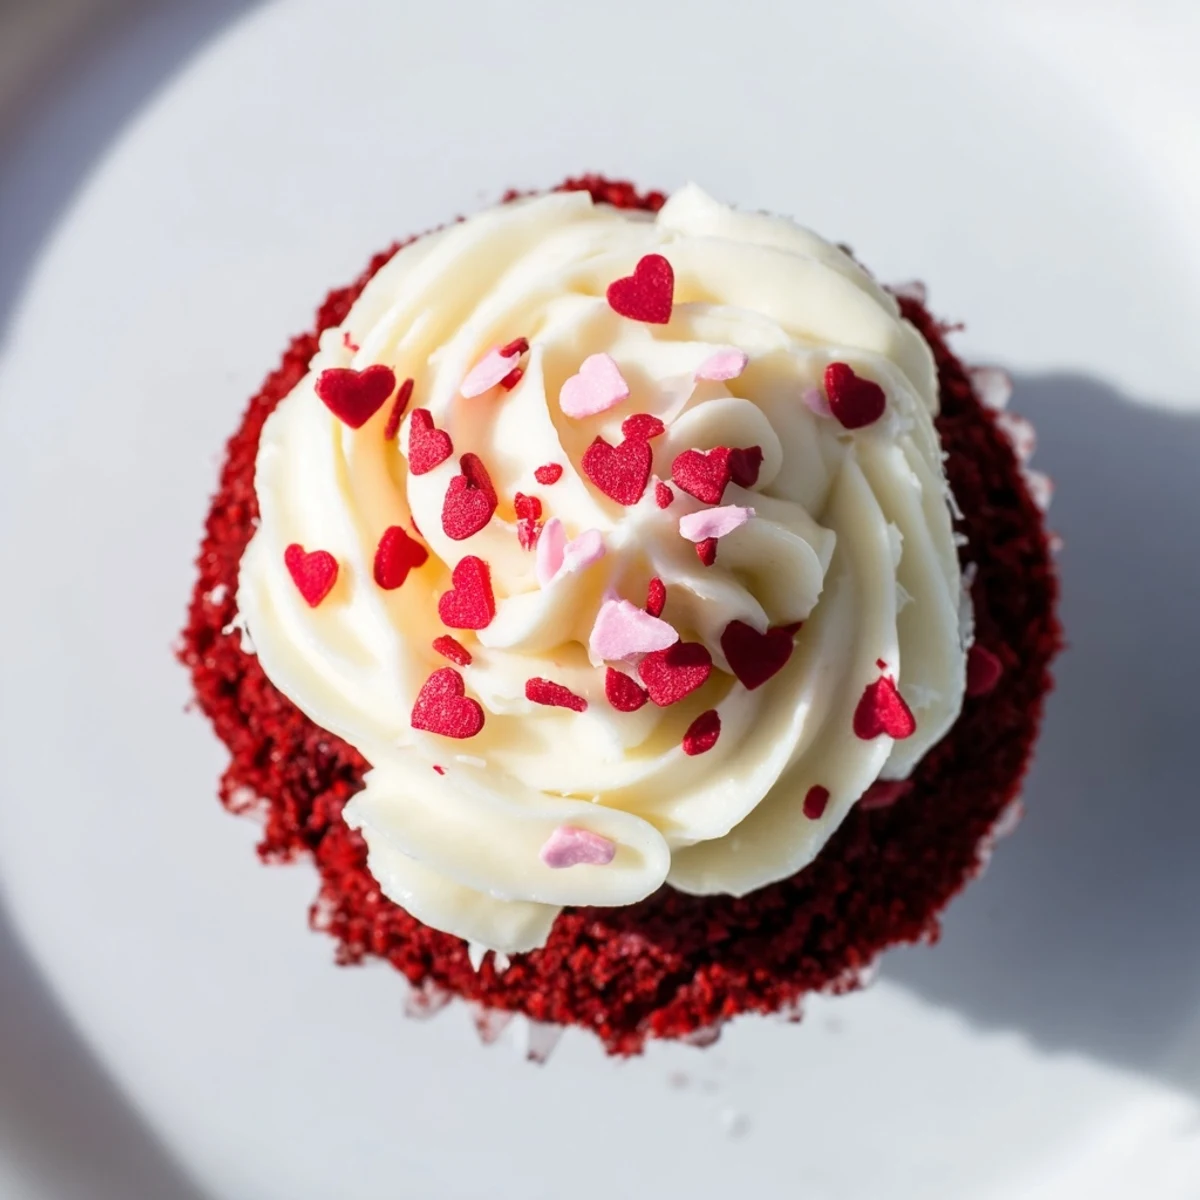
 These stunning red velvet cupcakes feature a tender crumb with subtle cocoa notes, topped with smooth, tangy cream cheese frosting. Baked for just 18-20 minutes at 350°F, they're light yet indulgent. The combination of buttermilk, vinegar, and vibrant red coloring creates that signature flavor and appearance. Cream cheese frosting is whipped until fluffy and piped generously on top. Perfect for Valentine's Day celebrations or any romantic occasion. Makes 12 cupcakes in under 40 minutes total.
The first time I made these red velvet cupcakes, I was racing against time before my partner arrived home for our impromptu Valentine's celebration. My kitchen looked like a crime scene with spots of red batter everywhere, but the moment they came out of the oven, that distinctive cocoa-vanilla scent filled our apartment. Something about their vibrant color against the snow falling outside our window made them feel magical.
Last February, I brought these to an office potluck where everyone was instructed to bring something red. As I watched my typically reserved coworker close his eyes with that first bite, I realized these weren't just Valentine's treats. The room actually got quieter as people ate, with several colleagues asking for the recipe before they'd even finished.
Ingredients
- Unsweetened cocoa powder: Just a tablespoon gives red velvet its distinctive flavor without overwhelming the delicate balance, I learned the hard way that using Dutch-processed changes the color dramatically.
- Buttermilk: This is your secret weapon for keeping these cupcakes impossibly tender, and bringing that subtle tang that makes red velvet different from regular chocolate cake.
- White vinegar: I was skeptical about this tiny amount making any difference, but it reacts with the baking soda to create the most delicate texture you can imagine.
- Cream cheese: Please let it come fully to room temperature before starting the frosting, otherwise youll end up with those frustrating little lumps that no amount of mixing can fix.
Instructions
- Prepare your workspace:
- Preheat your oven to 350°F and line your muffin tin with those pretty paper liners. I like to place a sheet of parchment paper under my mixing bowl because the red food coloring is notoriously sneaky.
- Mix the dry team:
- In your medium bowl, whisk together the flour, sugar, cocoa powder, baking soda, and salt until they look evenly combined. Make sure to break up any little cocoa clumps you see hiding in there.
- Blend the wet squad:
- In your large bowl, whisk the oil, buttermilk, eggs, vanilla, vinegar, and red food coloring until they become this gloriously vibrant mixture. The color should be almost alarmingly red, as it will mellow slightly during baking.
- Bring everyone together:
- Gradually add your dry ingredients to the wet mixture, stirring just until combined. Watch the batter transform with each fold, but resist the urge to overmix, even when you see those last few streaks of flour.
- Fill em up:
- Divide the batter evenly among your cupcake liners, filling each about 2/3 full. I use an ice cream scoop to keep things neat and ensure even baking.
- Bake to perfection:
- Slide them into your preheated oven for 18-20 minutes. Youll know theyre done when a toothpick inserted into the center comes out clean and the tops spring back slightly when touched.
- The cooling period:
- Let the cupcakes rest in the pan for 5 minutes before transferring to a cooling rack. This brief waiting period helps them set up properly so they dont fall apart on you.
- Whip up cloud-like frosting:
- Beat the softened cream cheese and butter together until silky smooth. This foundation is crucial for that perfect frosting texture.
- Sweeten the deal:
- Gradually add powdered sugar, beating until the frosting is light and fluffy. Mix in the vanilla and salt to balance the sweetness.
- Crown your creations:
- Once the cupcakes are completely cool, pipe or spread your frosting in generous swirls. For Valentine's Day, I sometimes add a little heart-shaped candy or fresh raspberry on top.
 Save Pin
 One snowy Valentine's evening, the power went out just as I was finishing the frosting for these cupcakes. My husband and I ended up eating them by candlelight, laughing as frosting somehow got on our noses. Now every year, we turn off all the lights and enjoy at least one cupcake by candlelight, even when the power is working perfectly fine.
Storage Solutions
These cupcakes develop an even deeper flavor profile after a night in the refrigerator, though the texture is best within the first two days. I keep mine in a container with a little headroom so the frosting doesnt get squished against the lid, which Ive done more times than I care to admit.
Festive Decorating Ideas
Beyond the classic swirl of cream cheese frosting, these cupcakes become truly Valentine-worthy with a few thoughtful touches. I once dipped strawberry halves in white chocolate, let them set, then nestled them into the frosting for an elegant finish that had everyone reaching for seconds.
Making Ahead and Freezing
The unfrosted cupcakes freeze beautifully for up to three months, which has saved me during many last-minute celebrations. Just wrap them individually in plastic wrap, then place in a freezer bag, and thaw at room temperature before frosting.
- For make-ahead convenience, prepare the cupcake batter and store it in the refrigerator for up to 24 hours before baking.
- The frosting can be made up to three days in advance and kept refrigerated, just bring it to room temperature and give it a quick whip before using.
- Assembled cupcakes are best enjoyed within three days, but the memories of sharing them will last much longer.
 Save Pin
 These red velvet cupcakes have become more than just a Valentine's tradition in our home, theyre our year-round reminder that taking time to create something special for the people we love is always worth the effort. As my grandmother used to say, dessert isnt just food, its an edible expression of affection.
Recipe Questions & Answers
- → Can I use gel food coloring instead of liquid?
-
Yes, gel food coloring is actually preferred for a more intense, vibrant red color. Use less gel coloring than liquid since it's more concentrated. Start with 1 tbsp and adjust to your desired shade.
- → Why do you add vinegar to the batter?
-
Vinegar reacts with baking soda to create a chemical reaction that helps the cupcakes rise and gives them that classic tender crumb. It also enhances the red color and adds a subtle tang that complements the cocoa notes.
- → How do I prevent overmixing the batter?
-
Mix the wet and dry ingredients until just combined, with no visible streaks of flour. Overmixing develops gluten, resulting in dense, tough cupcakes. Stir gently by hand rather than using an electric mixer for this final step.
- → Can I make the frosting ahead of time?
-
Yes, you can prepare the cream cheese frosting up to 2 days in advance. Store it in an airtight container in the refrigerator. Let it come to room temperature and re-whip briefly before piping onto cooled cupcakes.
- → How long do these cupcakes stay fresh?
-
Unfrosted cupcakes keep at room temperature for 2 days in an airtight container. Frosted cupcakes should be refrigerated and will stay fresh for up to 3 days. For longer storage, freeze unfrosted cupcakes for up to 3 months.
- → What can I use to decorate besides frosting?
-
Try heart-shaped sprinkles, fresh berries, edible gold leaf, or chocolate shavings for a festive touch. White chocolate curls or crushed freeze-dried raspberries also complement the red velvet flavor beautifully.