 Save Pin
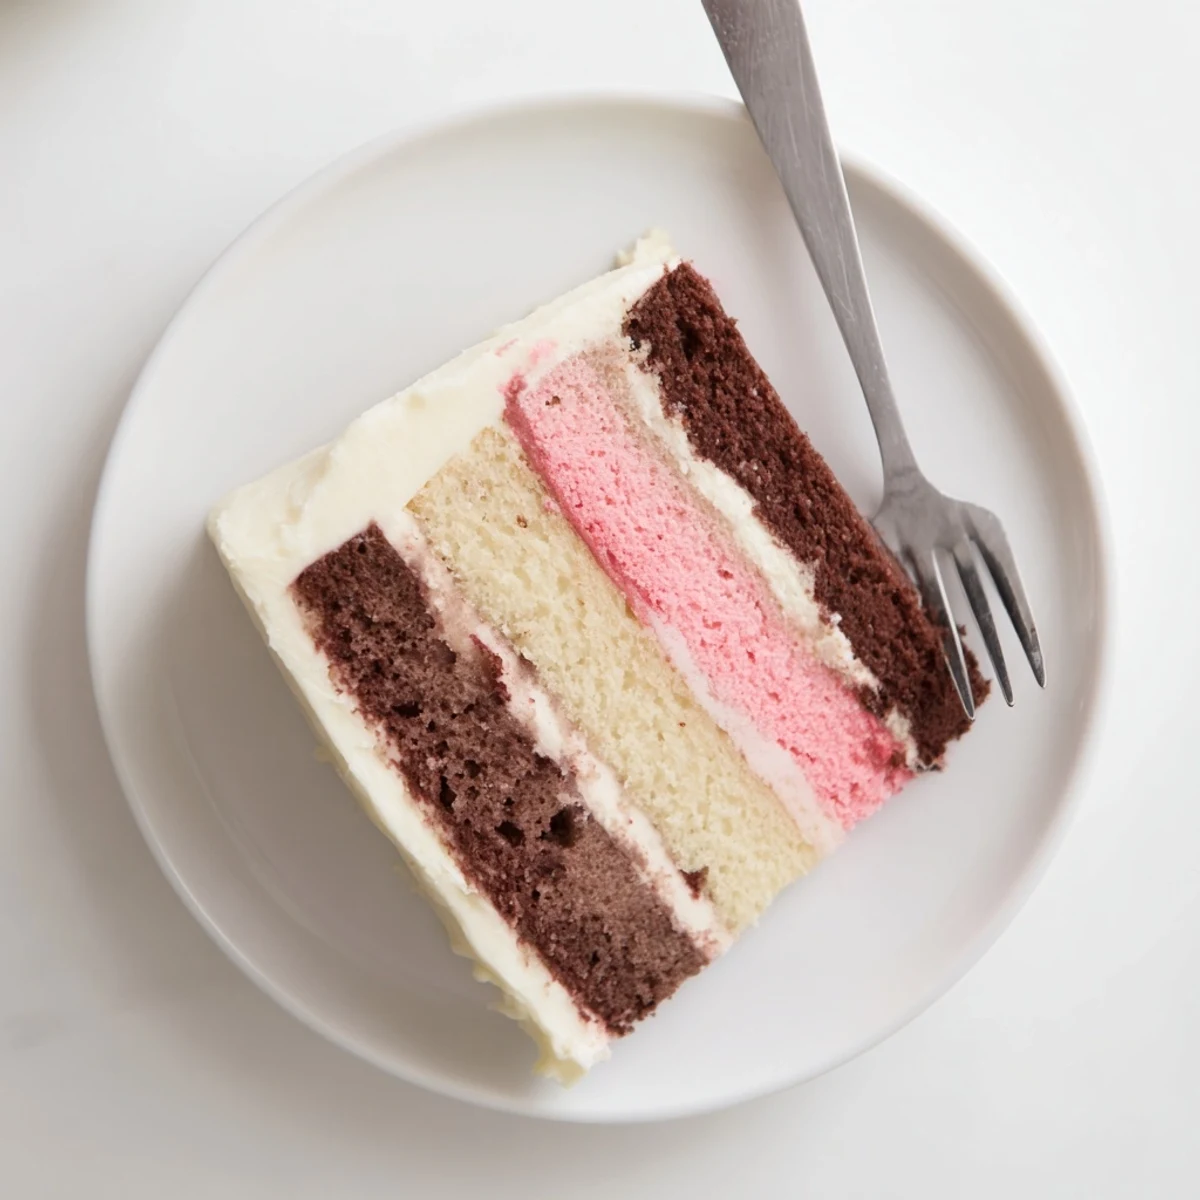
 This stunning dessert showcases the beloved combination of chocolate, vanilla, and strawberry in three distinct layers. Each colored sponge is baked separately then stacked with generous amounts of silky buttercream between tiers. The final creation features smooth white frosting covering the exterior, hiding the colorful surprise within. Ideal for birthdays and special occasions, this nostalgic treat delivers the iconic Neapolitan experience everyone remembers from childhood ice cream.
Last summer I attempted a Neapolitan cake for my niece's birthday, convinced three layers couldn't be that difficult. By midnight my kitchen looked like a pastel war zone, but when we sliced into that striped masterpiece the next afternoon, the collective gasp made every butter-stained dish towel worth it.
I've learned the hard way that room temperature ingredients aren't a suggestion they're literally chemistry. My first attempt with cold butter resulted in curdled batter and a kitchen panic session at 11 PM. Now I set everything out on the counter before I even put on my apron.
Ingredients
- 2¾ cups all-purpose flour: Spoon into your measuring cup and level off for accuracy, too much flour makes cake dense
- 2½ teaspoons baking powder: Check the expiration date, old leavener is why cakes sometimes refuse to rise
- ½ teaspoon baking soda: Works with the baking powder for that perfect lift
- ¼ teaspoon salt: Just enough to make the flavors pop without tasting salty
- 1 cup unsalted butter softened: Leave it out for at least an hour, you should be able to press your finger into it easily
- 2 cups granulated sugar: Cream this thoroughly with the butter, those air bubbles are what make cake tender
- 4 large eggs: Also room temperature, cold eggs can make the butter seize up into tiny grains
- 2 teaspoons vanilla extract: Use the real stuff, imitation never quite tastes right in something this special
- 1¼ cups whole milk: Full fat makes a difference in texture, don't skimp here
- ⅓ cup unsweetened cocoa powder: Sift it first or you'll spend forever whisking out the lumps
- 3 tablespoons milk: This thins the cocoa into a paste that incorporates smoothly into the batter
- ½ cup finely chopped fresh strawberries: Fresh is best but frozen puree works in a pinch, just thaw completely first
- Red food coloring: Totally optional but that pink layer is just so cheerful
- ½ teaspoon strawberry extract: Boosts the strawberry flavor without making the batter too wet
- 1½ cups unsalted butter softened: For the frosting, this needs to be properly soft or you'll get lumpy buttercream
- 5 cups powdered sugar sifted: Sifting is annoying but necessary, one sugar lump can ruin a whole batch
- ¼ cup heavy cream or milk: Adjust this to get the frosting consistency you want
- 2 teaspoons vanilla extract: Because vanilla buttercream is basically happiness on a spoon
- Pinch of salt: Cuts the sweetness just enough so you can actually eat more than one slice
Instructions
- Get everything ready first:
- Preheat your oven to 350°F and grease three 8-inch round pans with butter and line the bottoms with parchment. Those circles of parchment are your insurance policy.
- Whisk your dry ingredients together:
- In a medium bowl combine flour, baking powder, baking soda, and salt. This step prevents you from overmixing later when you're trying to get everything evenly distributed.
- Cream butter and sugar like you mean it:
- Beat that butter and sugar for at least 3 full minutes until it's pale and fluffy. Scrape down the sides of the bowl halfway through so everything gets incorporated evenly.
- Add eggs one by one:
- Crack each egg into a small bowl first just in case of shell fragments. Add them one at a time beating well after each one, then mix in your vanilla extract.
- Combine wet and dry:
- Alternate adding the flour mixture and milk starting and ending with the dry ingredients. Mix only until you don't see flour anymore, overworking develops gluten and makes cake tough.
- Divide and conquer the batter:
- Split your batter evenly between three bowls. I use a kitchen scale for precision but eyeballing works if you don't have one.
- Make the chocolate layer:
- Mix cocoa powder with 3 tablespoons milk until smooth, then gently fold into one bowl of batter. Don't overmix or you'll lose all those air bubbles you worked so hard to create.
- Make the strawberry layer:
- Fold chopped strawberries, strawberry extract, and food coloring if you're using it into the second bowl. The berries will leave little pink flecks that look so pretty when you slice into it.
- Leave the vanilla layer alone:
- The third bowl stays just as it is, simple and pure. Sometimes the uncomplicated layers are the best ones.
- Bake each layer:
- Pour batter into your prepared pans and smooth the tops with an offset spatula. Bake 25 to 30 minutes until a toothpick comes out clean or with just a few moist crumbs.
- Cool completely before frosting:
- Let the cakes rest in their pans for 10 minutes, then turn them out onto wire racks. Warm cake melts frosting, so resist the urge to start decorating until they're completely room temperature.
- Make the buttercream:
- Beat butter until creamy, then gradually add powdered sugar and salt. Add vanilla and cream, whipping until it's light and fluffy enough to spread easily.
- Stack your layers:
- Place the chocolate layer on your serving plate and spread frosting on top. Add the strawberry layer, more frosting, then finish with vanilla. The classic order is chocolate on bottom, vanilla on top.
- Apply a crumb coat:
- Frost the entire cake with a thin layer to lock in the crumbs. Chill for 30 minutes then add your final coat of buttercream for a pristine finish.
- Decorate however you like:
- I love adding fresh strawberries on top, sometimes chocolate curls too. Keep it simple or go all out, either way those three layers will be the star of the show.
 Save Pin
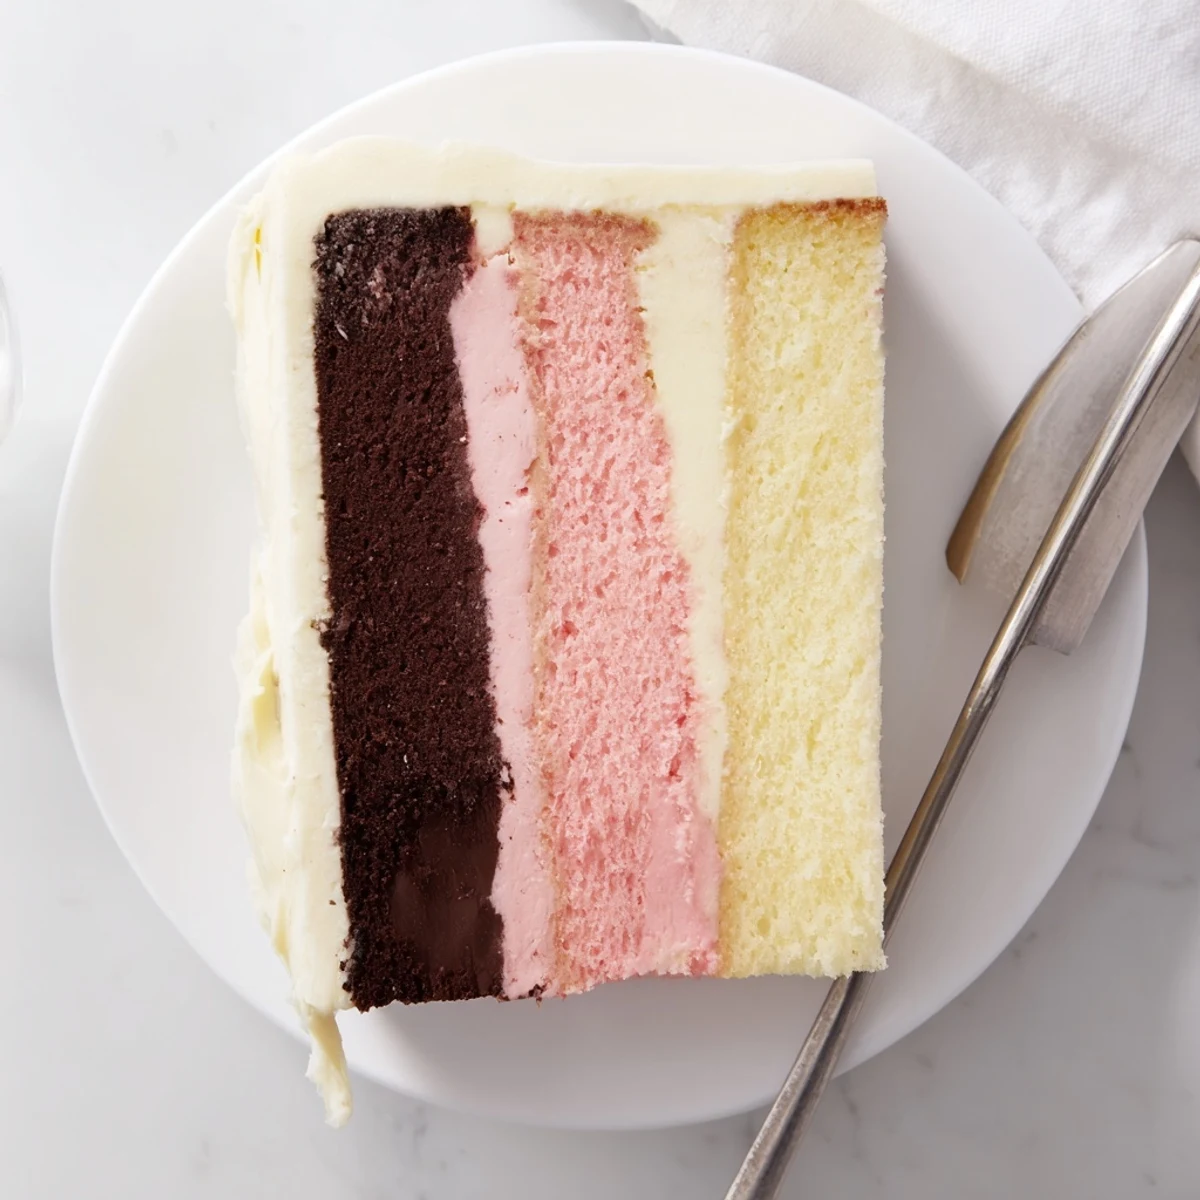
 This cake became my go-to celebration dessert after I made it for my dad's 60th birthday. He's always claimed vanilla is the only flavor worth eating, but I caught him going back for a second slice that included all three layers together. Small victories.
Making It Ahead
I bake the layers a day ahead and wrap each one tightly in plastic wrap. They actually develop better flavor and texture after resting overnight in the refrigerator, which means less day-of stress and a moister cake.
Getting Clean Slices
Run your knife under hot water and wipe it dry between every few slices. The warmth cuts through the buttercream smoothly without dragging, giving you those picture-perfect wedges that look like they came from a bakery.
Flavor Variations
Swap the strawberry layer for raspberry or cherry extract. I once used orange extract in the vanilla layer and chocolate ganache instead of cocoa powder for an almost creamsicle version. Some traditions are worth updating occasionally.
- Mix fresh berries into the buttercream for extra flavor and pretty flecks
- Add a teaspoon of espresso powder to the chocolate layer for depth
- Try crushed freeze-dried strawberries in the frosting for concentrated flavor without extra liquid
 Save Pin
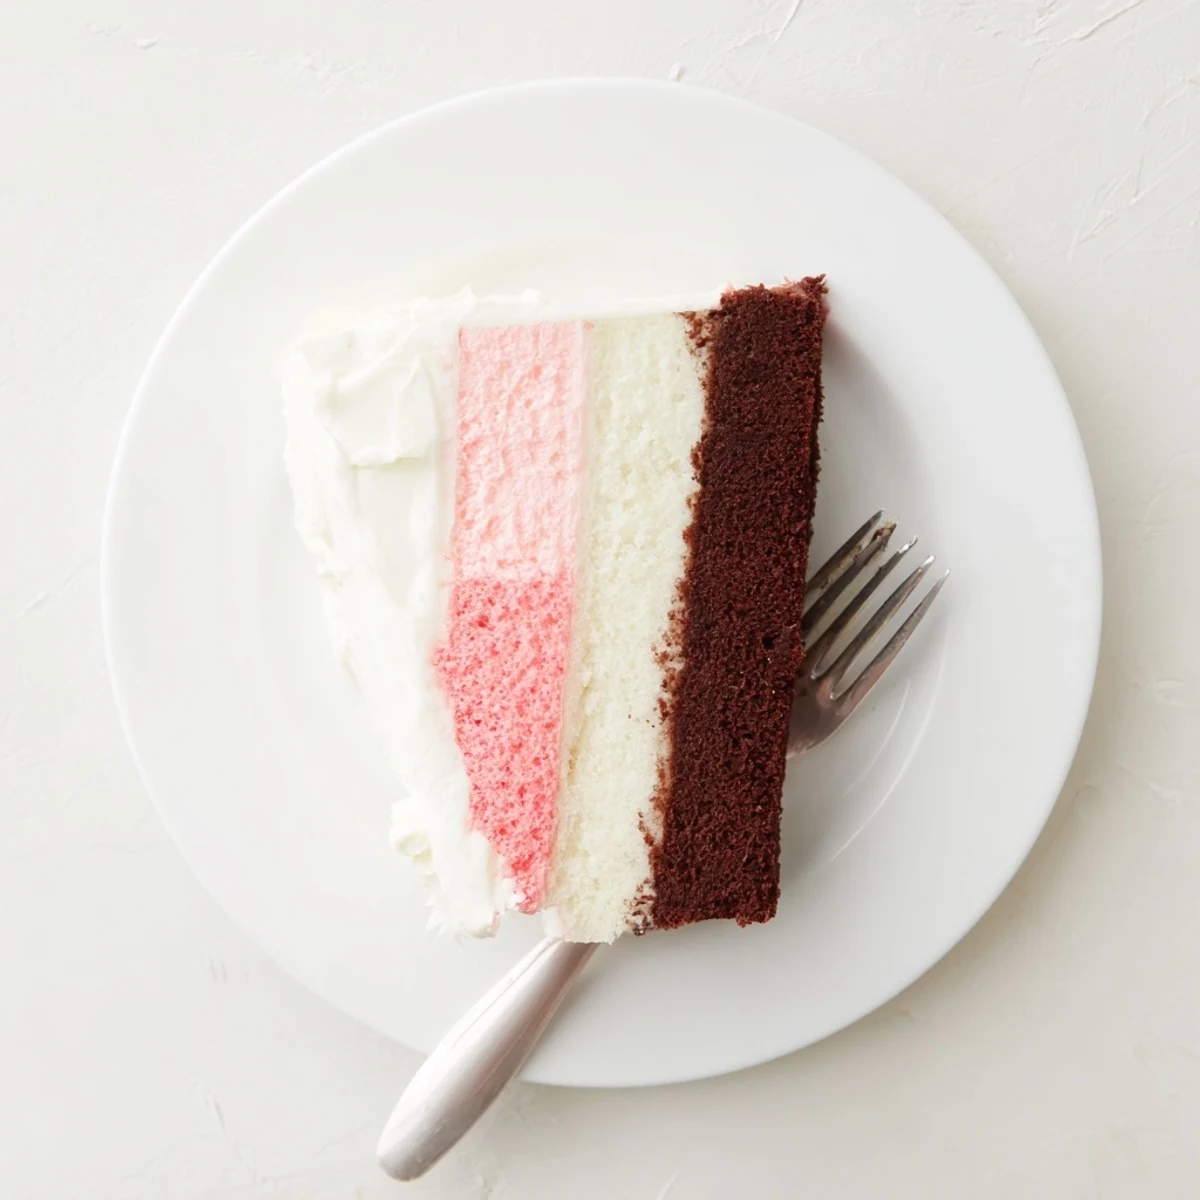
 There's something genuinely joyful about cutting into a cake that looks like childhood summers in baked form. Hope it becomes someone's favorite memory too.
Recipe Questions & Answers
- → How do I get clean layers when slicing the cake?
-
Chill the completed cake for at least 2 hours before slicing. Use a sharp serrated knife and wipe it clean between cuts. A warm knife dipped in hot water also helps create smooth slices through all three layers.
- → Can I make the layers ahead of time?
-
Yes, bake the layers up to 2 days in advance. Wrap each cooled layer tightly in plastic wrap and store at room temperature. Frost on the day you plan to serve for best texture and appearance.
- → What's the best way to distribute batter evenly?
-
Weigh each portion of batter using a kitchen scale for precision. Alternatively, use a measuring cup to portion equal amounts into each bowl. This ensures all three layers bake uniformly and finish at the same height.
- → Can I use frozen strawberries instead of fresh?
-
Frozen strawberries work well if thoroughly thawed and drained. Puree them and reduce the added milk by 1 tablespoon to account for the extra moisture. The flavor remains excellent though the color may be slightly more intense.
- → How should I store the finished cake?
-
Keep the assembled cake refrigerated in an airtight container or under a cake dome. It stays fresh for 3-4 days. Bring to room temperature 30 minutes before serving for the best flavor and texture.
- → Can I make this as cupcakes instead?
-
Absolutely. Divide each colored batter among muffin tins to create swirled cupcakes. Reduce baking time to 18-22 minutes. Frost with the same buttercream and top with sprinkles for a fun handheld version.