 Save Pin
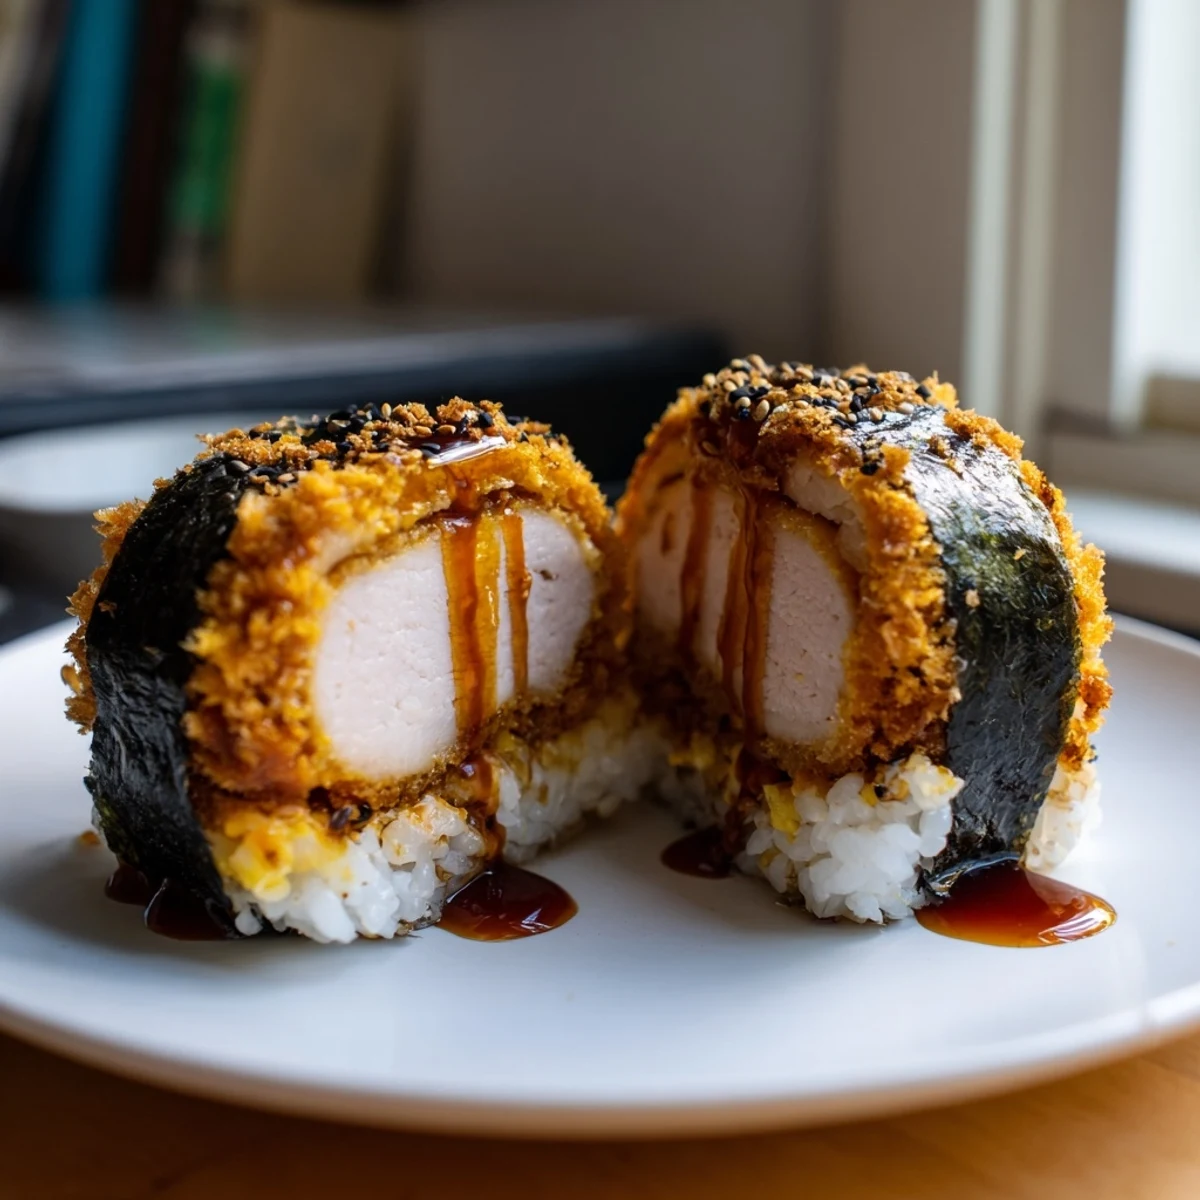
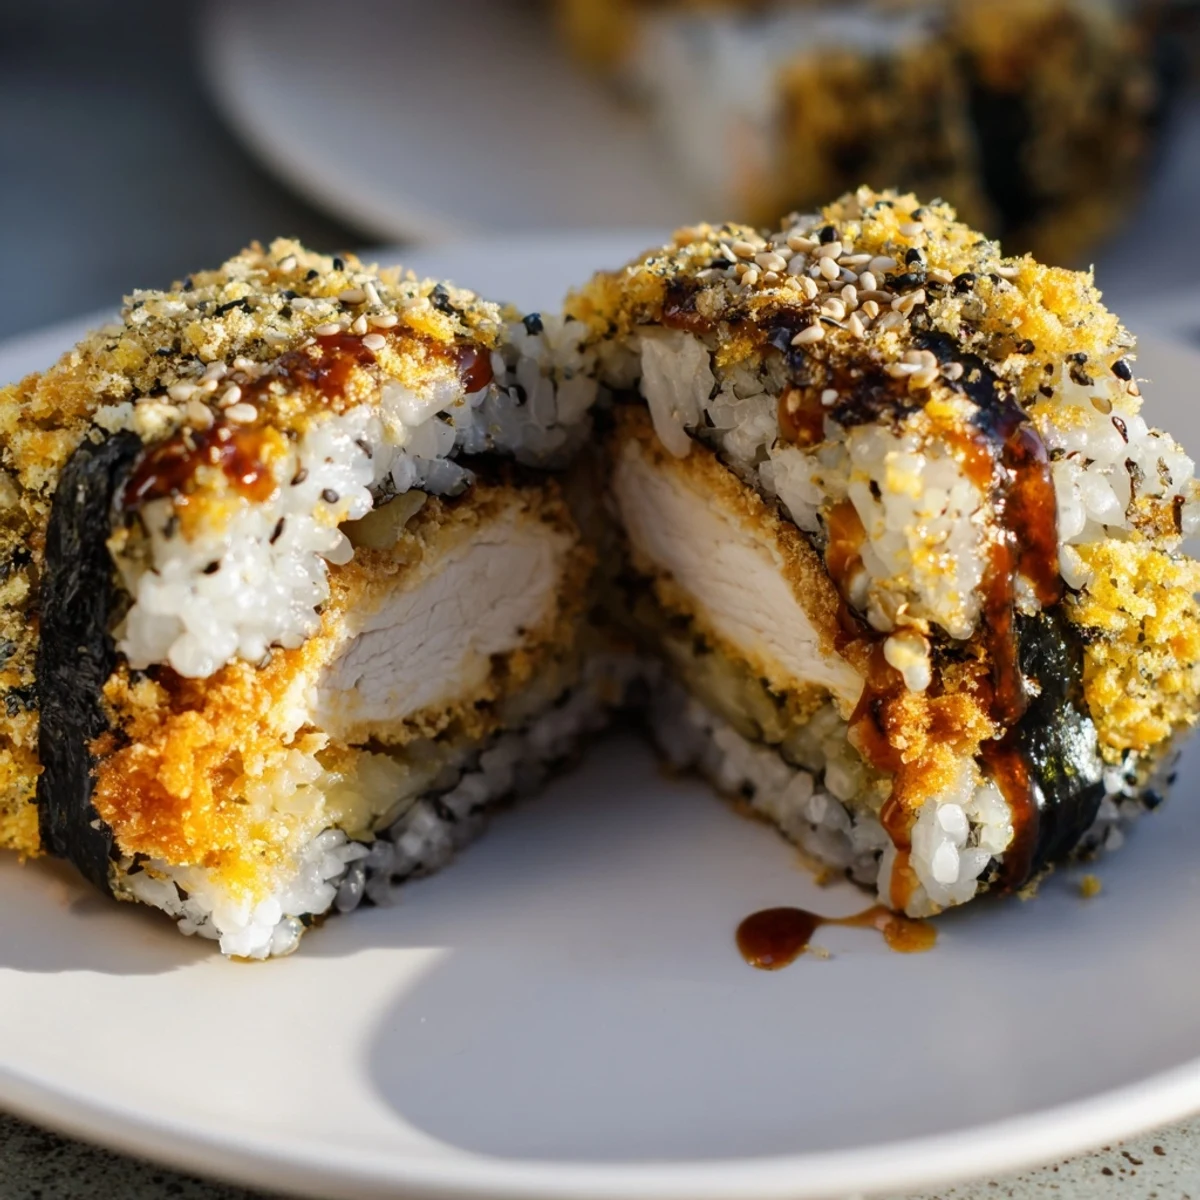
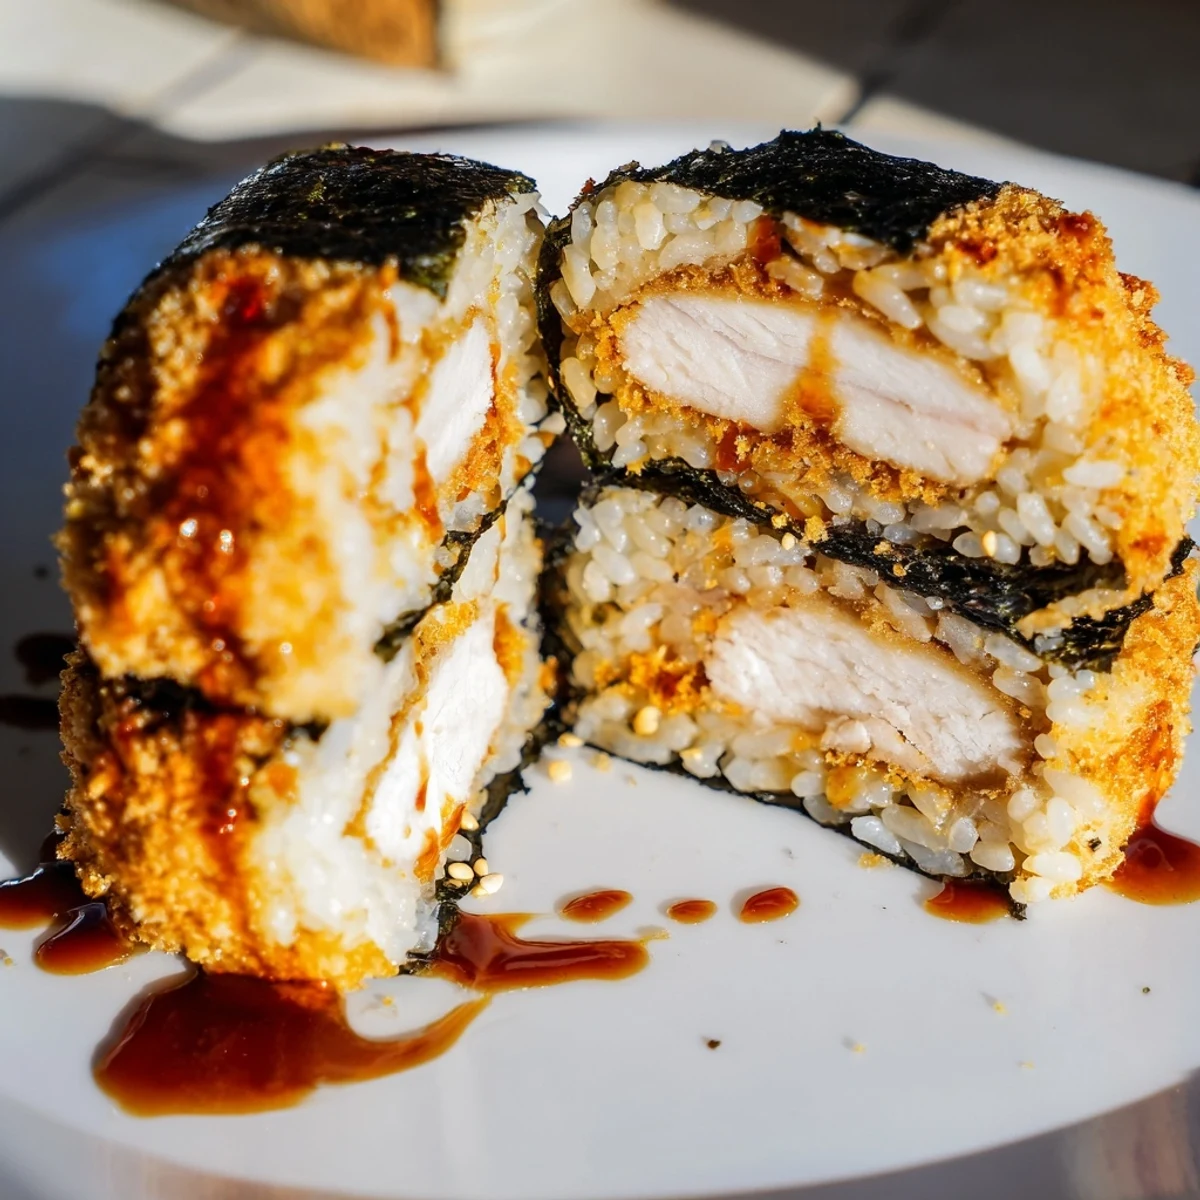
 Enjoy the perfect marriage of Hawaiian and Japanese cuisines with these handheld musubi. Golden, panko-crusted chicken thighs rest on a bed of vinegared short-grain rice, all wrapped in toasted nori seaweed. The sweet and tangy tonkatsu-soy glaze ties everything together, creating layers of flavor and texture in every bite. Ideal for meal prep, lunchboxes, or as a satisfying appetizer.
The first time I bit into a chicken katsu musubi at a Honolulu airport layover, I nearly missed my boarding call standing in line to buy three more. There was something about that contrast of shattering crispy panko against soft vinegared rice, all wrapped in salty nori, that felt like a revelation. I spent the next six months in my tiny Chicago kitchen trying to reverse-engineer that perfect portable bite, my roommate eventually staging an intervention when she found panko crumbs in the living room carpet again.
Last summer I made these for a beach picnic with friends, packing them still slightly warm in a cooler. Someone accidentally dropped one in the sand, and I'm still not proud of how quickly I considered the five second rule before common sense prevailed. We ended up sharing the remaining seven between four people, sitting on a blanket watching the sunset while debating whether doubling the sauce quantity was actually necessary or just greedy.
Ingredients
- 2 boneless skinless chicken thighs: Thighs stay juicier than breasts through the frying process, and their natural fat content helps the panko adhere better
- 1/2 teaspoon salt and 1/4 teaspoon black pepper: Season the chicken generously since this is your only chance to flavor the meat itself
- 1/2 cup all-purpose flour: Creates the first layer of coating that helps the egg wash grab onto the chicken surface
- 1 large egg mixed with 1 tablespoon milk: The milk thins the egg just enough for an even coating without being too thick or gloppy
- 1 cup panko breadcrumbs: Use the rough crushed kind rather than fine panko for that restaurant style shatter
- Vegetable oil for frying: You want about half an inch in the pan, enough to come halfway up the chicken pieces
- 2 cups warm cooked short-grain Japanese rice: Short grain is essential for that sticky clinging quality that holds the musubi together
- 1 tablespoon rice vinegar, 1/2 teaspoon sugar, and 1/2 teaspoon salt: This classic sushi rice seasoning adds brightness and cuts through the rich fried chicken
- 2 tablespoons tonkatsu sauce, 1 tablespoon soy sauce, and 1 teaspoon honey: The honey balances the salty umami and creates a lacquer like glaze on the chicken
- 4 sheets nori, halved: Look for roasted nori rather than raw, it has better flavor and crisps differently
- Furikake optional: That sesame seaweed sprinkle adds visual appeal and an extra savory punch
Instructions
- Prep your chicken for even cooking:
- Pound those chicken thighs to an even thickness, about half an inch thick, so they fry uniformly. Season both sides generously with the salt and pepper, letting them sit while you set up your coating station.
- Set up your breading assembly line:
- Arrange three shallow bowls in order: flour first, then the egg whisked with milk, finally the panko. Use one hand for dry ingredients and one for wet to keep your fingers from becoming completely breaded themselves.
- Coat each thigh completely:
- Dredge through flour, shaking off excess, then dip in egg wash, and finally press firmly into panko. Really press the crumbs into the chicken to ensure they stick during frying and create that thick crunchy layer.
- Fry until golden and perfect:
- Heat your oil until it shimmers and a panko crumb sizzles immediately. Fry chicken about 3 to 4 minutes per side until deeply golden and cooked through. Drain on paper towels and slice into strips that will fit inside your musubi.
- Season the rice while still warm:
- Whisk together rice vinegar, sugar, and salt until dissolved. Gently fold this mixture through your warm rice, being careful not to mash the grains. Let it cool slightly so it's easier to handle but still warm enough to form.
- Make the sauce mixture:
- Whisk tonkatsu sauce, soy sauce, and honey until completely smooth. The honey might take a minute to fully incorporate, but keep whisking until there's no separation.
- Start your assembly line:
- Lay out a sheet of plastic wrap and place a halved nori sheet shiny side down on top. The shiny side should face the rice, it's more subtle in flavor and lets the matte side show on the exterior.
- Build the first layer:
- With wet hands to prevent sticking, press about 1/4 cup seasoned rice into a compact rectangle in the center of the nori. Sprinkle with furikake if you're using it, then top with a slice of chicken and a drizzle of sauce.
- Add the final rice layer:
- Press another thin layer of rice over the chicken, using gentle but firm pressure to compact everything together. Wrap the nori around the filling, using the plastic wrap to help shape and compress the musubi into a tight rectangular block.
- Let them rest before serving:
- Let the wrapped musubi sit for 2 to 3 minutes so the nori softens slightly from the rice moisture and seals itself together. Unwrap from plastic and repeat with remaining ingredients.
 Save Pin
 My sister asked me to make these for her wedding welcome bags, and I spent three days in a rental house with assembly lines covering every available surface. The bride's taste test happened in the kitchen at midnight, both of us in sweatpants eating slightly imperfect rejects that were still somehow better than anything I'd made before.
Making Ahead Like A Pro
You can fry and slice the chicken up to a day ahead, storing it uncovered in the refrigerator so it stays crisp. The rice is best made the same day but can be kept warm in a rice cooker for several hours. Only assemble what you plan to eat within a few hours, as the nori will eventually become chewy rather than crisp.
Double Frying For Extra Crunch
The trick that restaurant kitchens use is frying the chicken twice. Fry first until golden, let rest on a wire rack for 10 minutes, then fry again for just 30 seconds per side. The second fry creates that shattering crust that stays crispy even after the sauce is added and the musubi is wrapped.
Storage And Serving
Wrapped musubi can be refrigerated for up to 24 hours, though the texture is best within 4 hours of assembly. For longer storage, freeze the cooked chicken and rice separately, then assemble when ready to eat. Serve at room temperature for the ideal texture contrast.
- If taking for lunch, wrap individually in wax paper rather than plastic to prevent condensation
- Pack a small container of extra sauce for dipping if you want maximum flavor
- The nori will soften over time, so eat within a day for the best texture experience
 Save Pin
 These musubi have become my go-to for road trips, beach days, and those nights when cooking feels like too much but takeout isn't quite right either. There's something deeply satisfying about food you can hold in one hand that still feels special and made with care.
Recipe Questions & Answers
- → What makes musubi different from sushi?
-
Musubi features pressed rice formed into blocks or rectangles, typically topped with proteins like Spam or chicken katsu, then wrapped in nori. Unlike sushi rolls, musubi is assembled as individual portions and designed as handheld convenience food.
- → Can I make chicken katsu musubi ahead of time?
-
Yes, musubi travels well for lunches or meal prep. Wrap each piece tightly in plastic wrap and refrigerate for up to 24 hours. The nori will soften over time, which some prefer. Bring to room temperature before eating for the best texture.
- → What's the best rice for musubi?
-
Short-grain Japanese rice or sushi rice is essential because its sticky texture holds the musubi shape together. Long-grain varieties won't bind properly. Rice should be warm when assembling to help it compress and adhere to itself.
- → How do I get the crispiest chicken katsu?
-
Double-frying creates the crunchiest coating. Fry once until golden, let drain and cool for 5 minutes, then fry again briefly for extra crispiness. Also ensure your oil is at 350°F and don't overcrowd the pan, which lowers temperature.
- → Can I bake instead of fry the chicken?
-
Baking won't achieve the same crispy texture as pan-frying, but it's a lighter option. Coat chicken as directed, place on a wire rack over a baking sheet, and bake at 425°F for 20-25 minutes, flipping halfway. The crust will be less crunchy.
- → What if I don't have a musubi press?
-
You don't need special equipment. Use a musubi mold, small rectangular food container lined with plastic, or simply press rice with wet hands into compact rectangles. The plastic wrap method works perfectly for shaping and compressing.